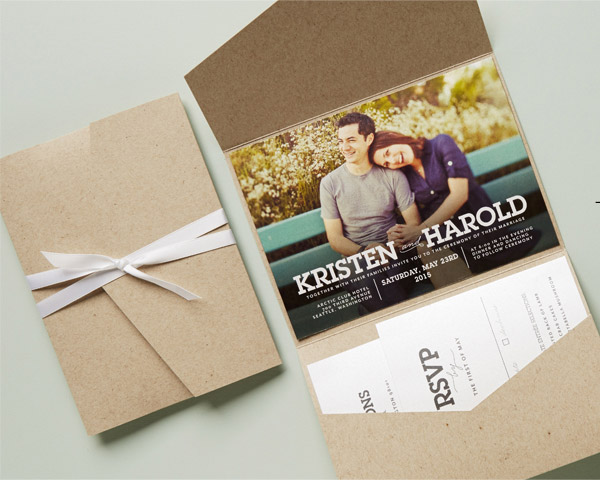
Wedding invitation suite showcased using Envelopments® Pocket Folds® and ribbon.
Part of a series of posts written in partnership with Wedding Paper Divas. Today, we are looking at some awesome ways to incorporate DIY details into your wedding invitation suite.
We all appreciate invitations with a personal touch, especially if they are handmade with love. A cool and relatively easy way to personalize your invites is to add DIY touches to your professionally printed invitation suite.
Jazz Up that Envelope
The humble envelope is sometimes overlooked in favor of what’s inside, but it doesn’t have to be that way! Here are some great ways to add unique touches to your save-the-date or wedding invitation envelopes.
Address Line Lettering. Calligraphy is not necessary when addressing a wedding invite envelope, but if you are blessed with beautiful handwriting, it is one of the more obvious DIY projects you can try. Aspiring calligraphers can turn to kits like The Lettered Bride, but for those challenged in the art of penmanship, there’s also “fake calligraphy” which involves printing a calligraphic font onto the envelope using very light ink, and then tracing the letters using a ballpoint pen. Your pen or brush selection can also influence the overall look and feel of the address line:
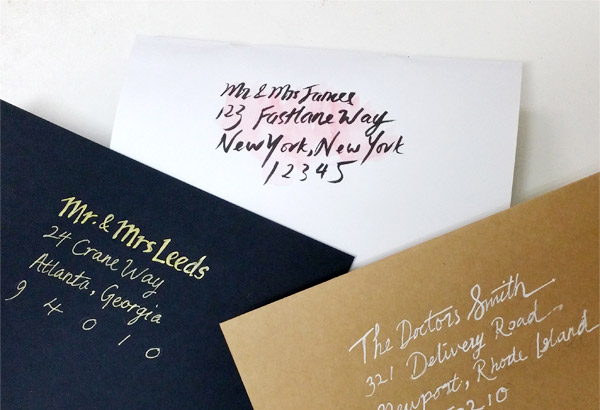
Nina: I used a black brush pen + watercolor on white, gold gel ink on black and white gel ink on kraft. Look closely and you’ll see pencil outlines on the kraft one!
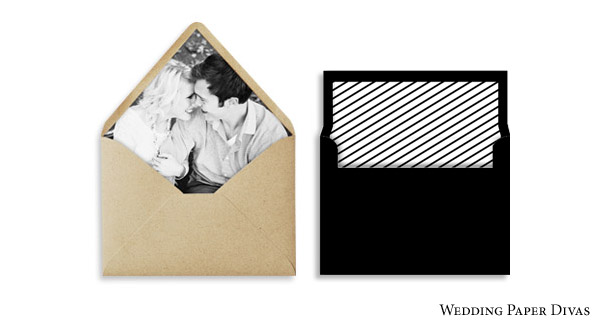
Custom Envelop Liners. We’ve seen some beautiful DIY envelope liner projects use vintage maps, doilies, glitter and illustrations. This DIY polka dot liner is really cute and surprisingly easy to do.
If you don’t want to deal with hassle of individually cutting and gluing each liner, Wedding Paper Divas envelope liner is an option you might want to consider when ordering your invites. These eye-catching liners (in patterned designs or customizable photos and text) are shaped to match your chosen envelope style, and come with adhesive at the back for easy assembly.
Personalized self-inking rubber stamps are great for return addresses. For a whimsical touch, you can add a watercolor wash on the stamped return address (like the example on the recipient address line above).
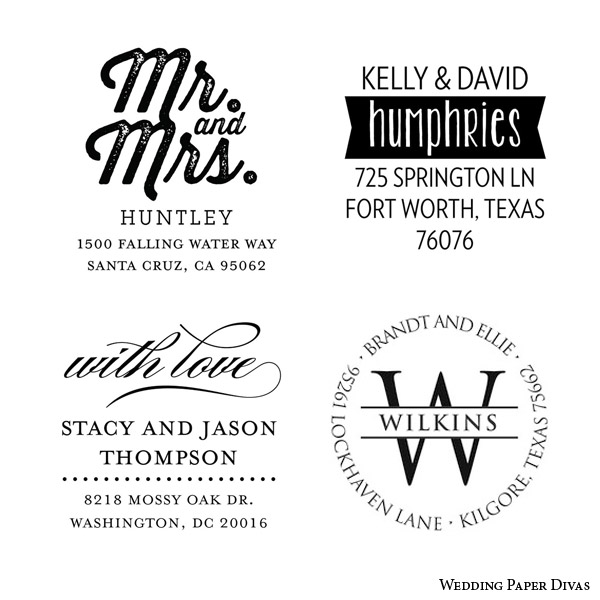
Custom self-inking stamps from top, left to right: Stamped Union, Banner Couple, Affectionate Address, Signature Circle
To make an unforgettable impression, try an embossed monogram*. Embossed detail adds an air of prestige to correspondences. For maximum “oohs” and “aahs”, you can also seal envelopes with gold or silver foil seals embossed with your initials and address.
The great thing about having your own embosser or rubber stamp is that you can go crazy with it — use it on favors, personal stationery, etc.
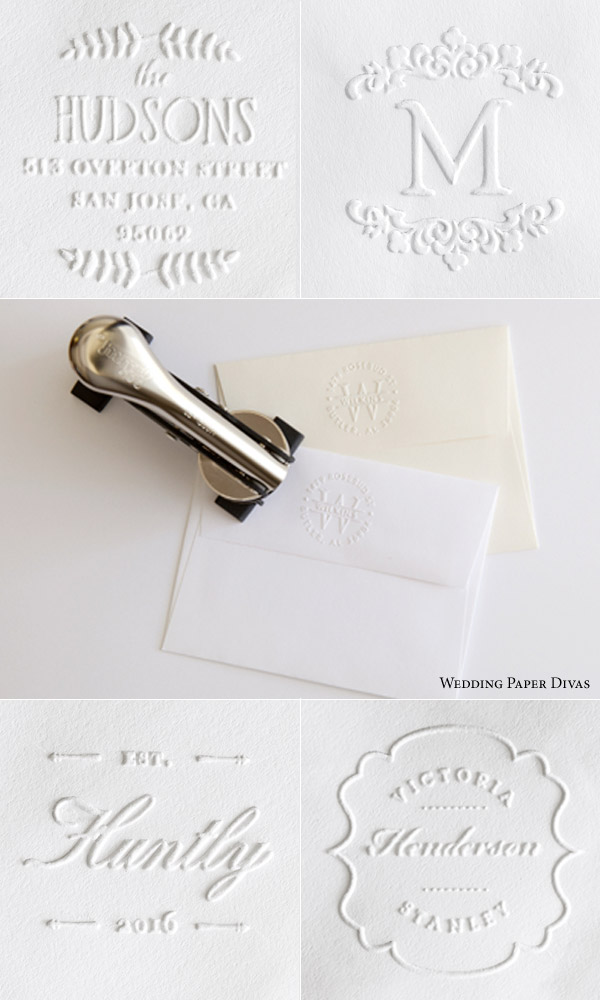
Custom embosser from top-left to right: Fine Fronds, Spring Initial; bottom-left to right: Darling Beginning, Precious Union
*To err on the side of caution, check with your local post office about using blind embossing for return addresses.
You can also create your own designs and have them printed on address label stickers or custom postage stamps.
Presenting… the Wedding Invitation Suite
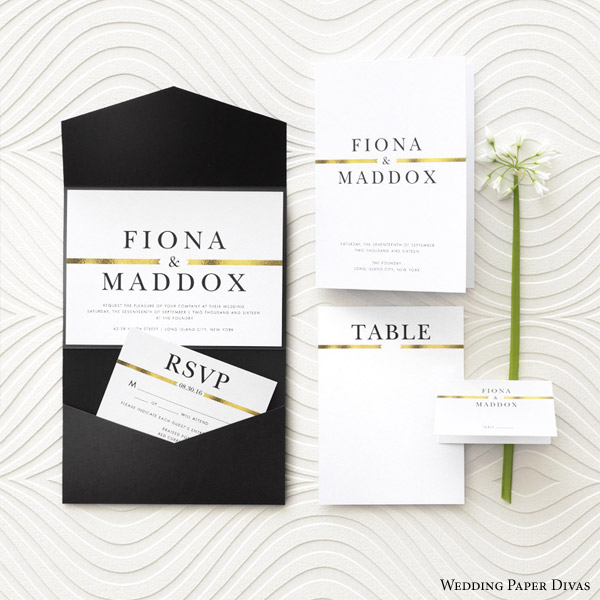
Golden Band wedding invitation suite and day-of wedding stationery.
The wedding invitation suite typically includes the wedding invite, response card and enclosure cards for website address, reception details, directions and additional information. The sizes and formats of these stationery items vary, so you need to get creative for a cohesive presentation.
An easy solution is to use Envelopments®. Envelopments® Pocket Folds®, Layered Pockets and Layered Cards are all stylish ways to present your invitation suite. These come in colors that coordinate with your invitation suite.
Belly Bands is another simple yet elegant way to neatly showcase your invitation suite. These are available in designs that match the invites -- perfect for a coordinated design experience.
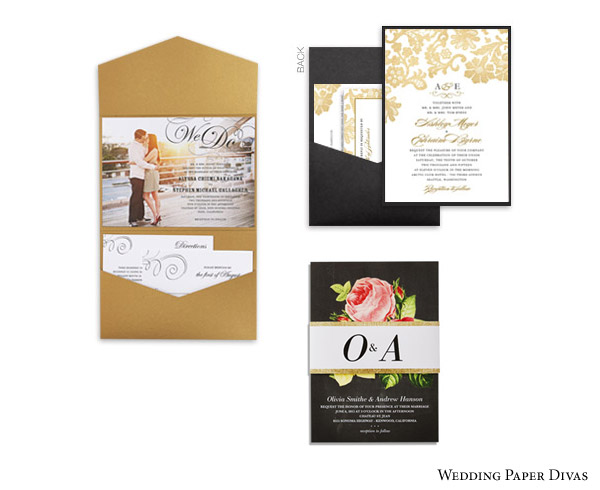
Clockwise from left: Envelopments® Pocket Folds®, Envelopment® Layered Pocket, and Belly Bands.
An alternative way to package your suite neatly is to use ribbons or twine, which work well with the idea of “tying the knot”. For a polished finishing touch, printed gift tags can be used together with ribbons.
Considerations before Deciding to DIY Your Wedding Invitations
If you've never seen a glue gun in your life, DIYing anything from scratch would come with a hard lesson in “Managing Expectations”. Sometimes, it's just better to DIT (do-it-together) instead. Here are some questions to ask yourself before committing to doing it yourself:
How many invites are required? An important determinant of whether a DIY project is doable or not for your wedding is the number of invitations that you will be sending out. 50 invites? Easy. 500? Let’s talk about time …
So… how much time do you have? Invitations need to be sent out about 8 weeks before the big day. DIY projects may take a month or more to execute, so remember to set aside enough time before embarking on them.
What’s your budget? Fully DIYed invitations may or may not be more economical than the custom options available with stationery specialists like Wedding Paper Divas. Remember to include the cost of supplies and your time when factoring the budget.
How much help can you get from your bridal party? It's great that your friends and family are offering to help, but there are many reasons why great friends can turn into flaky bridesmaids, so it’s important that you don’t get blindsided at the very last minute. If he/she is not returning your calls and texts early on, get ready for a backup plan.
Is this something you love? Handmade projects may be no-brainers for hardcore DIYers, for the rest of us, it’s good to know that we have options like Wedding Paper Divas DIY invitation kits.
For more great DIY inspiration, visit the Wedding Paper Divas blog, or the main site to find the perfect wedding invitation.

